Baked Meatball Parmesan

Baked Meatball Parmesan by David Wilkins                                                                                                                                                                                                                                                                                                                   Videography and Production by William W. Gilbert

Chef David Wilkins is an Engineering major. Here, he shows us how to make Baked Parmesan Meatballs. The recipe has been passed down through his family.

Ingredient List
• 1 lb. ground beef
• ½ cup grated parmesan cheese
• ¼ cup chopped fresh parsley
• 1 egg
• 1 clove garlic, minced

Directions

Pre-heat the oven to 375°F. While the oven is warming, mix all of the ingredients in a bowl. Using your hands, form mix into 12- 2″ meatballs. Place in a greased, foil-lined, 15x10x1-inch pan, then, bake for 25 min. or until done (160°F).

Serving Suggestion

Try serving with your favorite hot cooked pasta and sauce, and a quick-bagged salad tossed with your favorite dressing.
Substitute 1 Tbsp. parsley flakes for the chopped fresh parsley.
Prepare using 1 pkg. (16 oz.) ground turkey.

david2david1

3rd Annual Magazine Launch Party

This slideshow requires JavaScript.

The Taste of StMU magazine launch party expanded to a new location with a new sponsor, new donors, a new scholarship, a new university president and two new student design winners for the third annual event on Wednesday, November 28, 2012.

St. Mary’s alumnus Jose Trevino of All Events San Antonio sponsored the launch party, establishing the Taste of StMU scholarship to honor the winner of the “Professionals’ Choice” award.

Rachel Grahmann (see magazine) won the scholarship and Professionals’ Choice award as determined by a committee of professional consultants who work in the fields of graphic design, marketing and food catering. New University President Tom Mengler presented her with a certificate along with a St. Mary’s University bookstore gift card. Her respective “chef,” Kristina Garcia, received a commemorative award plate imprinted with the Taste of StMU logo.

Over 70 alumni, faculty, staff and guests attended the event and voted Nick Canedo’s magazine as the winner of the “People’s Choice” award. He also received a bookstore gift card while his “chef,” Kirsten Acosta, received an apron imprinted with the Taste of StMU logo.

The magazine launch party gave graphic design students the opportunity to showcase what they have learned throughout the semester by editing and creating their own 20-page edition of Taste of StMU magazine, complete with ads, photographs and stories. The chefs featured in their magazines provided the food for the event.

On the menu were banana lumpia, red velvet cupcakes, chocolate chip muffins, chicken fettuccine alfredo, blueberry cheesecake, fideo, Hershey’s chocolate cake and bizcochuelo con durazno.

The event also featured a trio of live jazz musicians on piano, saxophone and bass, and a slideshow was displayed which showcased magazine covers and short videos produced by former students—a number of whom were in attendance.

The graphic design class thanks all those who supported the event. See Flickr photo album.

Hershey’s Chocolate Cake

This slideshow requires JavaScript.

Hershey’s Chocolate cake  by Kimberly Quintanilla
Story and Photos by Danielle Torres 

Balancing baking and book work is never easy, but baking has always been part of Junior Health Administration major Kimberly Quintanilla’s life. She grew up watching her mom bake all the time. She enjoys cooking when she is bored, for fun and to relax. She chose to bake a Hershey’s chocolate cake because it is one of her favorite pastries.

Quintanilla says she loves attending St. Mary’s because the atmosphere is so friendly. “I love all my professors and the hospitality here is amazing,” she says.

Quintanilla enjoys eating pasta along with hot Cheetos and cream cheese. Her favorite kind of food to make is chicken pasta, even though she doesn’t get to make it much here at school because of her busy schedule.

Choosing to share this recipe wasn’t hard, especially with the new installation of ovens in every residence hall on campus this year.

In particular, she enjoys cake and chocolate so she had no problem combining the two to make one sweet pastry.

Some tips Quintanilla offers when preparing this are to “make sure to pre heat the oven, don’t be afraid to use lots of Choco powder and even if it might not look pretty it still will taste great.”

Cake Ingredients 

  • 2 c sugar
  • 1-3/4 c all-purpose flour
  • 3/4 c HERSHEY’S Cocoa
  • 1-1/2 tsp baking powder
  • 1-1/2 tsp baking soda
  • 1 tsp salt
  • 2 eggs
  • 1 c milk
  • 1/2 c vegetable oil
  • 2 tsp vanilla extract
  • 1 c boiling water

Frosting

  • 1/2 c (1 stick) butter or margarine
  •  2/3 c HERSHEY’S Cocoa
  •  3 c powdered sugar
  • 1/3 c milk
  • 1 tsp vanilla extract

Directions 

Preheat the oven to 350°F. Get all the ingredients and mix them in a large bowl later pour in the boiling water to help make it easier to sir. Sir until lumps are gone. Take two 9-inch pans with oil and flour so that when the cake bakes, it won’t stick to the pan. Stick both pans in the oven and bake for 30-35 minutes. Take them out and let them sit for about ten minutes to cool. While the cakes are in the oven,  start making the frosting. The first thing to do is melt butter in a bowl. Then stir in cocoa. Alternately add powdered sugar and milk, beating to spreading consistency. After that is done add small amounts of additional milk, if needed. Stir in vanilla after the milk is poured. When completed, the cake feeds up to 20 servings.

Fideo

This slideshow requires JavaScript.

Fideo by Jose Lucio
Article and Photos by Isaac Lucio

Affordable, fast, and easy to make—if those are qualities someone is looking for in a dish, then Jose Lucio’s recipe for fideo is the right one.

Jose Lucio, nighttime supervisor of the Blume Academic Library at St. Mary’s, was born in San Antonio and has had his three children attend the university.

Lucio likes the fact that St. Mary’s is a small university, believing that the smaller class sizes are much better for students, helps students’ behavior and allows less commotion than there may be at larger schools.

Lucio’s favorite foods are fish and Mexican, so he enjoys cooking different kinds of meat.

Often, he adds in spices and decides it is right by how it looks, so he found it interesting to give the spices actual measurements for this recipe.

He chose to cook fideo for its affordability, ease of preparation and taste.

It is also something that his family has eaten for dinner just about every day for years.

“We all make it a little bit different, just cook slow, don’t rush, and remember to use a low flame,” Lucio advises.

Ingredients

•1 c of Water
•½ box of Vermicelli
•½ tsp of Salt
•½ tsp of Pepper
•¼ tsp of Ground Camino
•1 can of Tomato Sauce

Directions
The first thing to do to make fideo is to place a pan on a stove and pour in half a box of Vermicelli, then turn on the fire to a low setting. Using a spoon, continually stir the Vermicelli around the pan until you notice some of them turning brown. At that point, pour in a cup of water, keeping in mind the steam from it will be hot. You no longer need to stir it, just add in half a tablespoon of Salt, half a tablespoon of Pepper, and a quarter tablespoon of Ground Camino, and then wait for the water to boil. Once it’s boiling, add one can of Tomato Sauce, fill the can with water and pour it in as well – this way you can get all of it into the pan. Now all you have to do is let it sit for three to five minutes, once the time is over, turn the fire off and enjoy. This recipe can serve from one to three people, depending on how hungry they are!

Steaming Spaghetti with Meat Sauce

This slideshow requires JavaScript.

Steaming Spaghetti with Meat Sauce
Story and Photos by Emily Scruggs

Priscilla Ortega, St. Mary’s University senior psychology major, prepares her signature dish, spaghetti, by following a coveted family recipe.

When she moved from her family’s home in McAllen, Texas, into a house she shares with her sister in San Antonio, her mother’s spaghetti recipe was one of the comforts of home that Ortega brought with her.

The small campus and strong sense of community are two aspects of St. Mary’s that encouraged Ortega to attend school there.

While these attributes are reminiscent of the small town Ortega grew up in, making her family’s spaghetti recipe is the best remedy when she feels homesick.

Ortega learned the pleasant blend of spices that makes up the spaghetti sauce at the age of 10, under the instruction of her mother and older sister.

Since then, cooking has been a relaxing hobby for her, especially when she feels the stress of balancing school and work.

Italian ranks at the top of her list of favorite foods, along with the Mexican dish botanas.

Though she typically likes diverse dishes, seafood remains to be one type of food that she dislikes.

After graduating from St. Mary’s in May 2012, Ortega plans to attend graduate school abroad to study international relations or mass communication.

She studied in London for a semester during her junior year and cannot wait to return.

London boasts a diverse cuisine, ranging from fish and chips to curry.

Even with the variety of food that will be available to her, Ortega will still keep her family’s spaghetti on the menu.

Ingredients

  • 1 large onion
  • 2 T of butter
  • 3 crushed garlic cloves
  • 1 lbs of ground beef
  • 2 tsp of garlic salt
  • 2 tsp of onion salt
  • 2 tsp of crushed red pepper
  • 2 tsp of pepper
  • 2 tsp of cumin
  • 16 oz Ragu mushroom sauce
  • 1 package of spaghetti noodles
Serves eight.
Directions

Chop onion and sauté with butter and garlic. When onion and garlic have softened, sauté ground beef until completely brown. Add to beef garlic salt, onion salt, red pepper flakes, pepper and cumin. Once everything is softened and well- cooked, pour mushroom sauce over beef and warm over low heat. Boil spaghetti noodles for 10 minutes. Once noodles are soft, serve them on a plate and cover them with beef sauce. Serve in the company of crescent rolls.

Seven Layer Dip

This slideshow requires JavaScript.

Seven Layer Dip
Story and Photos by Bailey Philman 

What is best part of every party? The Seven Layer Dip of course!

At least that is what Mallory Unger, a current graduate student at St. Mary’s University, thinks of her famous dish.

“This dip is definitely special. It’s always the first dish finished at every party. Everyone loves it and it’s perfect for not just parties but for snacks and even lunch,” Unger says.

Her love for food and entertaining came from being born to a military family, where traveling the country and moving every few years was expected.

“I learned from a young age to try everything once. That is what my Dad has always taught me. Plus, I have lived in so many different places and the food is always different everywhere I go,” says Unger.

Food may be an adventure for her but everyone has a favorite. A staple in Unger’s refrigerator is Italian food–pasta and meatballs are her favorite.

Unger may have travelled the country, but the small campus of St. Mary’s in San Antonio caught her eye.

She says that she loves St. Mary’s for its tight-knit community and how friendly everyone is here.

Her love of meeting new people led her to pursue a master’s degree in communication studies at St. Mary’s and eventually work for an advertising agency in the future.

So what’s the best advice she can offer to new students and cooks in the kitchen?

“When you make Seven Layer Dip, be sure to use a clear dish so people can see exactly what is in the dish. It’s also important to plan ahead and try your best to multitask,” Unger says.

And, of course, “Work hard, play hard!”

Ingredients

  • 1 pound ground beef
  • 1 (16 oz.) can refried beans
  • 4 c shredded Cheddar-Monterey Jack cheese blend
  • 1 (8 oz.) container sour cream
  • 1 c guacamole
  • 1 c salsa
  • 1/2 c chopped tomatoes
  • 1/2 c chopped green onions

Directions

In a large skillet, brown ground beef. Set aside and let it cool to room temperature. Be sure to drain before adding to the dip. Spread the beans into the bottom of a clear bowl or serving tray that is at least 5 inches deep. Sprinkle 2 cups of shredded cheese on top of beans. Sprinkle beef on top of cheese. Spread sour cream very slowly on top of beef. Spread guacamole on top of sour cream. Pour salsa over guacamole and spread evenly. Sprinkle remaining shredded cheese. Sprinkle tomatoes and green onions on top as garnish. You can serve this dish immediately, or refrigerate it over night and serve cold. I think it tastes better at room temperature. Makes 10 servings.

Gluten-Free Red Velvet Cake

This slideshow requires JavaScript.

Gluten-Free Red Velvet Cake
Story and Photos by Chrystalla Georghiou 

At the age of 23, Victoria De La Fuente found out that her life will no longer be filled with sweets. De La Fuente, a graduate student at St. Mary’s University studying for an MBA, learned recently that she was allergic to the one ingredient most often found in desserts: gluten.

After graduating from St. Mary’s with her bachelor’s degree in business, De La Fuente decided to continue with graduate studies at the university. “I’ve always loved the small community feel of St. Mary’s–coming from a small town, it’s just what I wanted in a school,” she says.

“I wanted to start cooking gluten-free foods because my doctor told me I am allergic. I decided that I want to live a gluten free-lifestyle whether my doctor tells me that it’s ok to eat gluten-free foods or not. Gluten is not something that the human body was designed to digest, therefore it is not healthy for people to eat food which contains that ingredient,” says De La Fuente.

Gluten intolerance, also known as Celiac disease (or Coeliac disease) is a genetic disorder that makes one intolerant to gluten. It is caused by a reaction to gliadin (a gluten protein found in wheat) and affect all types of people; however, it seems to be more prevalent among those of Northern European descent. In the U.S., about one in 133 people suffer from Celiac disease.

Since learning of her condition, De La Fuente has given up some her favorite foods like pasta, grilled cheese sandwiches and red velvet cake. “Luckily I don’t have to give up tortillas. I think I would not be able to survive if I had to give up tortillas,” says De La Fuente.

Because most desserts contain some form of gluten, gluten-free desserts are among the most difficult to prepare. De la Fuente says that the most challenging part of a gluten-free diet is the selection of gluten-free foods. When cooking a red velvet cake, De La Fuente believes that “following the recipe matters more than anything else. All it takes is one simple mistake to ruin a whole cake.”

Some tips De La Fuente advises to young chefs include always making sure to preheat the oven, cleaning up as you go and never eating the frosting before the cake finishes cooking.

“I chose this recipe because it is gluten-free and I love red velvet cake. It’s not every day that I get to eat desserts, therefore, I was so excited to see that I could have my cake and eat it too,” De La Fuente concludes.

Ingredients

  • 3/4 c brown rice flour
  • 1/4 c coconut flour
  • 3/4 c sorghum flour
  • 3/4 c tapioca starch
  • 1 tsp baking soda
  • 1 tsp xanthan gum
  • 1/4 tsp salt
  • 1/4 c unsweetened cocoa powder, divided
  • 1 c canola oil
  • 1 1/2 c white sugar
  • 2 eggs at room temperature
  • 3/4 c unsweetened applesauce
  • 1 c buttermilk
  • 1 oz red food coloring
  • 1 tsp vanilla extract

Directions

Preheat oven to 350°F. Grease and flour 2 9-inch round cake pans with gluten-free flour. In a bowl, whisk together the brown rice flour, coconut flour, sorghum flour, tapioca starch, baking soda, xanthan gum, salt, and 3 tablespoons of cocoa powder in a bowl. In a large mixing bowl, beat canola oil and sugar until thoroughly combined, and beat the eggs in one at a time until fully incorporated. Stir in the applesauce. Beat the flour mixture into the wet ingredients, alternating with buttermilk, in several additions, beginning and ending with flour mixture. Mix the remaining 1 T of cocoa powder with the red food coloring and vanilla extract to make a paste; gently stir into the batter. Pour the batter into the prepared cake pans. Bake in the preheated oven until a toothpick inserted into the center of a cake comes out clean, about 25 minutes. Allow the cakes to cool completely before frosting. Makes 12 servings.


Cheese Enchiladas

This slideshow requires JavaScript.

Cheese Enchiladas
Story and Photos by Preston Jones

San Antonio is a predominantly Hispanic city, where Mexican-styled food is an important part of the city’s culture.

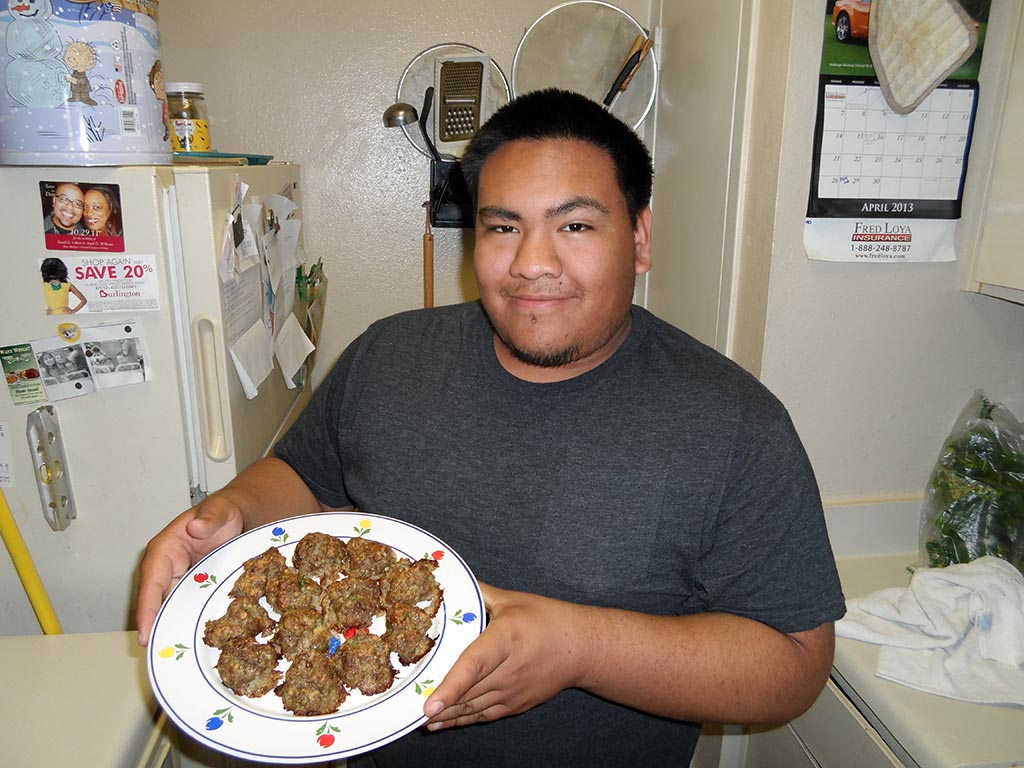
A native from El Paso, Dion Jeraldo Castro pays tribute to that culture by making cheese enchiladas.

After graduating in May 2013, Castro hopes to attend a graduate school in California to pursue opportunites in acting.

Castro has starred in high school plays, made his own music videos, and also was featured in other videos he produced on YouTube.

Already being a talented actor, Castro wants to take his skills to the next level and try to and find professional work.

Recently, Castro switched majors from Exercise and Sports Science to English-Communication Arts and discovered a passion for course such as Film Studies, Media Production and Graphics. Additionally, he plans to earn a minor in drama which will give him some experience in acting.

In addition to acting, Castro also is passionate about basketball.

As a member of the Rattler basketball team at St. Mary’s, he plays shooting guard and has been on the team since his freshman year.

Growing up in El Paso, Castro says that some of his favorite foods to eat are Mexican.

He enjoys enchiladas, tacos and flautas, but also likes other foods.

“I enjoy Italian food as well, such as Chicken Parmesans and Chicken Alfredo. One of my favorite dishes is a Japanese dish called Chicken Teriyaki,” says Castro.

Castro likes to cook simple foods such as bean and cheese tacos, nachos or these cheese enchiladas.

“Living on campus prevents me from cooking as much as I would like and am often stuck with going to the [school] cafeteria, or eating fast food,” he says.

Castro feels that this dish relates well with the St. Mary’s community and is simple to cook.

It is one of the first meals that his mom taught him to make while growing up in El Paso.

“This dish is very simple to make,” says Castro.

Basically, what  is seen in the directions is the way to prepare this dish.

The best advice that Castro offers when making this dish is to use only as much cheese as desired.

“If you’re not a lover of cheese, then do not pour it on. But, if you do love cheese, then go head and go nuts,” says Castro.

 Ingredients

  • 1 24 fl oz bottle Canola Oil (use as needed)
  • 17-20 Red tortillas
  • 32oz bag of Mexican shredded cheese
  • 2 3oz cans of Old El Paso Enchilada sauce
  • Foil

Directions

Cover the bottom of a flat round pan with canola oil, and turn the heat to medium high. Pour the Old El Paso sauce into a medium sized pan, and turn pilot to medium high to heat the sauce. Have a large pan to place into the oven ready on the side and preheat oven to 350. Take the red tortillas one at a time and run through oil just to soften, and then dip in Old El Paso sauce to cover tortilla. Place tortilla in baking pan, put cheese in the middle and roll tortilla. Push tortilla all the way to the side of pan. (Note: Spray pan with nonstick spray before putting tortillas down. Repeat steps four and five lining up rolled tortillas until bottom of pan is filled. Once pan is filled pour left over sauce into pan just to moisten the top of tortillas. Pour as much cheese as wanted over tortillas. Cover pan with foil and place in oven. Bake until cheese melted, take out of oven and let sit for 5 minutes, then serve and enjoy. This recipe will make up to six servings with three enchiladas on each plate.

2nd Annual Magazine Launch Party

This slideshow requires JavaScript.

The sweet smell of success came not only from the food being served in Treadaway Hall but also from two students who won awards for their graphic design final projects at the second annual Taste of StMU magazine launch on Friday, Nov. 18, 2011.

Volunteer judges who work in the graphic design field selected Emily Scruggs (see magazine) as the winner of the “Professionals’ Choice” award. Her respective “chef” also received an apron imprinted with the Taste of StMU logo. Nearly 40 alumni, faculty and staff attended this event and voted Brissa Renteria as the winner of the “People’s Choice” award.

The magazine launch party gave graphic design students the opportunity to showcase what they have learned throughout the semester by editing and creating their own 20-page edition of Taste of StMU magazine, complete with ads, photographs and stories. The chefs featured in their magazines provided the food for the event.

On the menu were arroz con gandules, cheese enchiladas, Cuban lechon asado, pumpkin chocolate chip cookies, flan, peanut butter chocolate chip brownies, no-bake strawberry frosted cheesecake, grey poupon steak with garlic mashed potatoes, gluten-free red velvet cake, seven layer dip, enchiladas, rojas, spinach and ricotta stuffed shells, steaming spaghetti with meat sauce, swedish meatballs and grilled chicken breast with mango salsa.

This project also was featured on the December 2011 issue of E-Talk from St. Mary’s University. See Flickr photo album.

Pasta Salad

Pasta Salad by Gaby Hernandez
Videography and Production by Jasmine Garcia

Gaby Hernandez is a senior criminal justice major at St. Mary’s University. She learned how to cook through her culinary arts teacher in high school and her sister. She enjoys cooking for her family and friends.

Ingredients

  • Parmesan cheese
  • Kraft Free Zefty Italian dressing
  • 4.25 oz can Baby Corn
  • 14.5 oz can Artichoke Hearts
  • 14.5 oz can Hearts of Palm salad cuts
  • 16 oz bag of mixed frozen vegetables (carrots, water chestnuts and broccoli)
  • 16 oz bag Garden Rotini pasta

Directions

First you fill a medium sized pot with water and boil at high temperature. Once the water is at a boiling point, pour the pasta into the boiling water. If it looks like the water is about to overflow, pour some of the water out into the sink. While the pasta is cooking, microwave the frozen vegetables for about 4-5 minutes with two tablespoons of water in a microwaveable bowl. Then, cut the hearts of pam and baby corn into small bite size pieces. Pour the hearts of palm and baby corn into a large bowl. Mix it all together with a large cooking spoon. Pour the italian dressing and parmesan cheese (as desired) and mix. 6-8 servings.